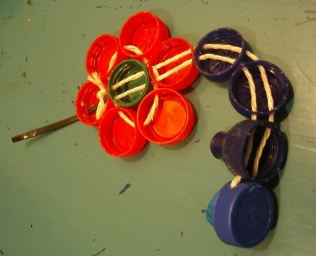
Urban capping
| Languages: |
English • Nederlands |
Are you tired of all this waste flooding your environment? Here's a fun project to brighten up your view: Urban Capping. This is your chance to reuse these bottle caps and pieces of tie wrap you find lying on the street everywhere.
Contents
How to make a bottle cap lace
Measure
Measure the circumference of the object to wrap. The lace will need this length plus an extra 5-10%. Use a mould with the same circumference, for instance a flowerpot, to test your lace for real.
Layout
Layout your bottle cap like this:
By using a double rope, the bottle caps can be fixated to have them all facing the same direction. By using a tie wrap, you can wrap the lace fast while leaving the possibility to undo the wrap: just insert a screw driver into the tie wrap insertion hole and the wrap comes undone.
Middle cap
Drill four holes into each cap, except for the first and the last cap:
Tail cap
The last bottle cap only needs two holes plus the tie wrap insertion hole:
Making the tie wrap insertion hole takes some practice. You can use a small chisel (6 mm or 1/4 inch) and give five pushes (U-shape & V-shape) on the inside of the bottle cap. Then use a sharp knife to finish it.
Head cap
The first bottle cap requires two holes plus an outlet for the tie wrap:
You can use a saw to start clearing the hole and then use a sharp knife to finish it.
Assembly
Tie the caps together, fix the piece of tie wrap and you're ready to wrap.
How to make a bottle cap flower
Create a bottle cap lace, and add a circle of buttons to the second-last bottle cap:
Happy capping!
See also
- Urban Capping group on Flickr
- If this is all too easy for you, you can also make fly curtains of plastic bottle caps.
- Urban knitting, which got me inspired


